Raumschiffe der Hanuhr Handelsunion: Unterschied zwischen den Versionen
Zur Navigation springen
Zur Suche springen
Amun (Diskussion | Beiträge) |
Amun (Diskussion | Beiträge) |
||
| Zeile 1: | Zeile 1: | ||
| + | =Vorbemerkungen= | ||
'''Daten, Version 0.81 (Alpha 6.1)'''. | '''Daten, Version 0.81 (Alpha 6.1)'''. | ||
(Generell sind immer die Ingame-Daten der jeweils aktuellen Version von Birth of the Empires maßgebend.) | (Generell sind immer die Ingame-Daten der jeweils aktuellen Version von Birth of the Empires maßgebend.) | ||
| + | |||
| + | * Alle max. Daten bei den Verteidigungs- und Waffensystemen sind exklusive der möglichen Boni der Spezialforschungen. | ||
| + | * Alle max. Daten der Hüllenstärke, sind bezogen auf die bestmögliche Hüllenpanzerung (meist doppelte Iridiumpanzerung). | ||
| + | * Bei der Manövrierbarkeit werden Werte mit und (wenn vorhanden) ohne doppelter Hüllenpanzerung angegeben. (doppelte Panzerung = -1) | ||
| + | |||
=Schiffsklassen= | =Schiffsklassen= | ||
| Zeile 30: | Zeile 36: | ||
| style="background-color:#b2ffb0;" align="center" | Hüllenstärke(Basis): | | style="background-color:#b2ffb0;" align="center" | Hüllenstärke(Basis): | ||
| style="background-color:#b2ffb0;" align="center" | 300 | | style="background-color:#b2ffb0;" align="center" | 300 | ||
| − | | style="background-color:#b2ffb0;" align="center" | | + | | style="background-color:#b2ffb0;" align="center" | '''800''' |
|- | |- | ||
| style="background-color:#b2ffb0;" align="center" | Schildstärke(Basis): | | style="background-color:#b2ffb0;" align="center" | Schildstärke(Basis): | ||
| style="background-color:#b2ffb0;" align="center" | 600 | | style="background-color:#b2ffb0;" align="center" | 600 | ||
| − | | style="background-color:#b2ffb0;" align="center" | | + | | style="background-color:#b2ffb0;" align="center" | '''800''' |
| + | |- | ||
| + | | style="background-color:#D1DEEE;" align="center" | | ||
| + | | style="background-color:#D1DEEE;" align="center" | | ||
| + | | style="background-color:#D1DEEE;" align="center" | | ||
| + | |- | ||
| + | | style="background-color:#B4CDCD;" align="center" | max. Beam-Typ: | ||
| + | | style="background-color:#B4CDCD;" align="center" | - | ||
| + | | style="background-color:#B4CDCD;" align="center" | - | ||
| + | |- | ||
| + | | style="background-color:#D1DEEE;" align="center" | | ||
| + | | style="background-color:#D1DEEE;" align="center" | | ||
| + | | style="background-color:#D1DEEE;" align="center" | | ||
|- | |- | ||
| style="background-color:#ffb0b0;" align="center" | [[Beam]] (Basis)/ max.: | | style="background-color:#ffb0b0;" align="center" | [[Beam]] (Basis)/ max.: | ||
| Zeile 88: | Zeile 106: | ||
| style="background-color:#B4CDCD;" align="center" | | | style="background-color:#B4CDCD;" align="center" | | ||
|} | |} | ||
| + | |||
===Kolonieschiffe/Colony Ship (Schiffstyp 1)=== | ===Kolonieschiffe/Colony Ship (Schiffstyp 1)=== | ||
| Zeile 120: | Zeile 139: | ||
| style="background-color:#b2ffb0;" align="center" | 200 | | style="background-color:#b2ffb0;" align="center" | 200 | ||
| style="background-color:#b2ffb0;" align="center" | 500 | | style="background-color:#b2ffb0;" align="center" | 500 | ||
| − | | style="background-color:#b2ffb0;" align="center" | 1. | + | | style="background-color:#b2ffb0;" align="center" | '''1.200''' |
|- | |- | ||
| style="background-color:#b2ffb0;" align="center" | Schildstärke(Basis): | | style="background-color:#b2ffb0;" align="center" | Schildstärke(Basis): | ||
| style="background-color:#b2ffb0;" align="center" | 400 | | style="background-color:#b2ffb0;" align="center" | 400 | ||
| style="background-color:#b2ffb0;" align="center" | 4.000 | | style="background-color:#b2ffb0;" align="center" | 4.000 | ||
| − | | style="background-color:#b2ffb0;" align="center" | | + | | style="background-color:#b2ffb0;" align="center" | '''1.200''' |
| + | |- | ||
| + | | style="background-color:#D1DEEE;" align="center" | | ||
| + | | style="background-color:#D1DEEE;" align="center" | | ||
| + | | style="background-color:#D1DEEE;" align="center" | | ||
| + | | style="background-color:#D1DEEE;" align="center" | | ||
| + | |- | ||
| + | | style="background-color:#B4CDCD;" align="center" | max. Beam-Typ: | ||
| + | | style="background-color:#B4CDCD;" align="center" | - | ||
| + | | style="background-color:#B4CDCD;" align="center" | - | ||
| + | | style="background-color:#B4CDCD;" align="center" | - | ||
| + | |- | ||
| + | | style="background-color:#D1DEEE;" align="center" | | ||
| + | | style="background-color:#D1DEEE;" align="center" | | ||
| + | | style="background-color:#D1DEEE;" align="center" | | ||
| + | | style="background-color:#D1DEEE;" align="center" | | ||
|- | |- | ||
| style="background-color:#ffb0b0;" align="center" | Beam (Basis)/ max.: | | style="background-color:#ffb0b0;" align="center" | Beam (Basis)/ max.: | ||
| Zeile 155: | Zeile 189: | ||
| style="background-color:#B4CDCD;" align="center" | miserabel | | style="background-color:#B4CDCD;" align="center" | miserabel | ||
| style="background-color:#B4CDCD;" align="center" | miserabel | | style="background-color:#B4CDCD;" align="center" | miserabel | ||
| − | | style="background-color:#B4CDCD;" align="center" | sehr schlecht | + | | style="background-color:#B4CDCD;" align="center" | schlecht/ sehr schlecht |
|- | |- | ||
| style="background-color:#B4CDCD;" align="center" | Scanstärke: | | style="background-color:#B4CDCD;" align="center" | Scanstärke: | ||
| Zeile 224: | Zeile 258: | ||
| style="background-color:#b2ffb0;" align="center" | 80 | | style="background-color:#b2ffb0;" align="center" | 80 | ||
| style="background-color:#b2ffb0;" align="center" | 180 | | style="background-color:#b2ffb0;" align="center" | 180 | ||
| − | | style="background-color:#b2ffb0;" align="center" | | + | | style="background-color:#b2ffb0;" align="center" | '''600''' |
|- | |- | ||
| style="background-color:#b2ffb0;" align="center" | Schildstärke(Basis): | | style="background-color:#b2ffb0;" align="center" | Schildstärke(Basis): | ||
| style="background-color:#b2ffb0;" align="center" | 160 | | style="background-color:#b2ffb0;" align="center" | 160 | ||
| style="background-color:#b2ffb0;" align="center" | 1.000 | | style="background-color:#b2ffb0;" align="center" | 1.000 | ||
| − | | style="background-color:#b2ffb0;" align="center" | 1.800 | + | | style="background-color:#b2ffb0;" align="center" | '''1.800''' |
| + | |- | ||
| + | | style="background-color:#D1DEEE;" align="center" | | ||
| + | | style="background-color:#D1DEEE;" align="center" | | ||
| + | | style="background-color:#D1DEEE;" align="center" | | ||
| + | | style="background-color:#D1DEEE;" align="center" | | ||
| + | |- | ||
| + | | style="background-color:#B4CDCD;" align="center" | max. Beam-Typ: | ||
| + | | style="background-color:#B4CDCD;" align="center" | | ||
| + | | style="background-color:#B4CDCD;" align="center" | | ||
| + | | style="background-color:#B4CDCD;" align="center" | 12 | ||
| + | |- | ||
| + | | style="background-color:#D1DEEE;" align="center" | | ||
| + | | style="background-color:#D1DEEE;" align="center" | | ||
| + | | style="background-color:#D1DEEE;" align="center" | | ||
| + | | style="background-color:#D1DEEE;" align="center" | | ||
|- | |- | ||
| style="background-color:#ffb0b0;" align="center" | Beam (Basis)/ max.: | | style="background-color:#ffb0b0;" align="center" | Beam (Basis)/ max.: | ||
| style="background-color:#ffb0b0;" align="center" | 273 | | style="background-color:#ffb0b0;" align="center" | 273 | ||
| style="background-color:#ffb0b0;" align="center" | 819 | | style="background-color:#ffb0b0;" align="center" | 819 | ||
| − | | style="background-color:#ffb0b0;" align="center" | 819 | + | | style="background-color:#ffb0b0;" align="center" | '''819''' |
|- | |- | ||
| style="background-color:#ffb0b0;" align="center" | Torpedo (Basis)/ max.: | | style="background-color:#ffb0b0;" align="center" | Torpedo (Basis)/ max.: | ||
| style="background-color:#ffb0b0;" align="center" | 250 | | style="background-color:#ffb0b0;" align="center" | 250 | ||
| style="background-color:#ffb0b0;" align="center" | 666 | | style="background-color:#ffb0b0;" align="center" | 666 | ||
| − | | style="background-color:#ffb0b0;" align="center" | 4999 | + | | style="background-color:#ffb0b0;" align="center" | '''4999''' |
|- | |- | ||
| style="background-color:#D1DEEE;" align="center" | | | style="background-color:#D1DEEE;" align="center" | | ||
| Zeile 257: | Zeile 306: | ||
|- | |- | ||
| style="background-color:#B4CDCD;" align="center" | Manövrierbarkeit: | | style="background-color:#B4CDCD;" align="center" | Manövrierbarkeit: | ||
| − | | style="background-color:#B4CDCD;" align="center" | | + | | style="background-color:#B4CDCD;" align="center" | |
| − | | style="background-color:#B4CDCD;" align="center" | | + | | style="background-color:#B4CDCD;" align="center" | |
| − | | style="background-color:#B4CDCD;" align="center" | sehr | + | | style="background-color:#B4CDCD;" align="center" | exzellent/ sehr gut |
|- | |- | ||
| style="background-color:#B4CDCD;" align="center" | Scanstärke: | | style="background-color:#B4CDCD;" align="center" | Scanstärke: | ||
| Zeile 333: | Zeile 382: | ||
| style="background-color:#b2ffb0;" align="center" | 170 | | style="background-color:#b2ffb0;" align="center" | 170 | ||
| style="background-color:#b2ffb0;" align="center" | 400 | | style="background-color:#b2ffb0;" align="center" | 400 | ||
| − | | style="background-color:#b2ffb0;" align="center" | 360 | + | | style="background-color:#b2ffb0;" align="center" | 360/'''1.200''' |
| − | | style="background-color:#b2ffb0;" align="center" | 420 | + | | style="background-color:#b2ffb0;" align="center" | 420/ '''1.260''' |
|- | |- | ||
| style="background-color:#b2ffb0;" align="center" | Schildstärke(Basis): | | style="background-color:#b2ffb0;" align="center" | Schildstärke(Basis): | ||
| style="background-color:#b2ffb0;" align="center" | 750 | | style="background-color:#b2ffb0;" align="center" | 750 | ||
| − | | style="background-color:#b2ffb0;" align="center" | 1.300 | + | | style="background-color:#b2ffb0;" align="center" | '''1.300''' |
| style="background-color:#b2ffb0;" align="center" | 2.000 | | style="background-color:#b2ffb0;" align="center" | 2.000 | ||
| − | | style="background-color:#b2ffb0;" align="center" | 2.100 | + | | style="background-color:#b2ffb0;" align="center" | '''2.100''' |
| + | |- | ||
| + | | style="background-color:#D1DEEE;" align="center" | | ||
| + | | style="background-color:#D1DEEE;" align="center" | | ||
| + | | style="background-color:#D1DEEE;" align="center" | | ||
| + | | style="background-color:#D1DEEE;" align="center" | | ||
| + | | style="background-color:#D1DEEE;" align="center" | | ||
| + | |- | ||
| + | | style="background-color:#B4CDCD;" align="center" | max. Beam-Typ: | ||
| + | | style="background-color:#B4CDCD;" align="center" | | ||
| + | | style="background-color:#B4CDCD;" align="center" | 10 | ||
| + | | style="background-color:#B4CDCD;" align="center" | | ||
| + | | style="background-color:#B4CDCD;" align="center" | 12 | ||
| + | |- | ||
| + | | style="background-color:#D1DEEE;" align="center" | | ||
| + | | style="background-color:#D1DEEE;" align="center" | | ||
| + | | style="background-color:#D1DEEE;" align="center" | | ||
| + | | style="background-color:#D1DEEE;" align="center" | | ||
| + | | style="background-color:#D1DEEE;" align="center" | | ||
|- | |- | ||
| style="background-color:#ffb0b0;" align="center" | Beam (Basis)/ max.: | | style="background-color:#ffb0b0;" align="center" | Beam (Basis)/ max.: | ||
| style="background-color:#ffb0b0;" align="center" | 864 | | style="background-color:#ffb0b0;" align="center" | 864 | ||
| − | | style="background-color:#ffb0b0;" align="center" | 1.638 | + | | style="background-color:#ffb0b0;" align="center" | '''1.638''' |
| style="background-color:#ffb0b0;" align="center" | 2.450 | | style="background-color:#ffb0b0;" align="center" | 2.450 | ||
| − | | style="background-color:#ffb0b0;" align="center" | 2.184 | + | | style="background-color:#ffb0b0;" align="center" | '''2.184''' |
|- | |- | ||
| style="background-color:#ffb0b0;" align="center" | Torpedo (Basis)/ max.: | | style="background-color:#ffb0b0;" align="center" | Torpedo (Basis)/ max.: | ||
| style="background-color:#ffb0b0;" align="center" | 500 | | style="background-color:#ffb0b0;" align="center" | 500 | ||
| − | | style="background-color:#ffb0b0;" align="center" | 750 | + | | style="background-color:#ffb0b0;" align="center" | 750/ '''3.583''' |
| style="background-color:#ffb0b0;" align="center" | 666 | | style="background-color:#ffb0b0;" align="center" | 666 | ||
| − | | style="background-color:#ffb0b0;" align="center" | 4.999 | + | | style="background-color:#ffb0b0;" align="center" | '''4.999''' |
|- | |- | ||
| style="background-color:#D1DEEE;" align="center" | | | style="background-color:#D1DEEE;" align="center" | | ||
| Zeile 374: | Zeile 441: | ||
| style="background-color:#B4CDCD;" align="center" | Manövrierbarkeit: | | style="background-color:#B4CDCD;" align="center" | Manövrierbarkeit: | ||
| style="background-color:#B4CDCD;" align="center" | normal | | style="background-color:#B4CDCD;" align="center" | normal | ||
| + | | style="background-color:#B4CDCD;" align="center" | normal/ ausreichend | ||
| style="background-color:#B4CDCD;" align="center" | normal | | style="background-color:#B4CDCD;" align="center" | normal | ||
| − | | style="background-color:#B4CDCD;" align="center" | normal | + | | style="background-color:#B4CDCD;" align="center" | gut/ normal |
| − | |||
|- | |- | ||
| style="background-color:#B4CDCD;" align="center" | Scanstärke: | | style="background-color:#B4CDCD;" align="center" | Scanstärke: | ||
| Zeile 441: | Zeile 508: | ||
|- | |- | ||
| style="background-color:#b2ffb0;" align="center" | Hüllenstärke(Basis): | | style="background-color:#b2ffb0;" align="center" | Hüllenstärke(Basis): | ||
| − | | style="background-color:#b2ffb0;" align="center" | 160 | + | | style="background-color:#b2ffb0;" align="center" | 160/ '''480''' |
|- | |- | ||
| style="background-color:#b2ffb0;" align="center" | Schildstärke(Basis): | | style="background-color:#b2ffb0;" align="center" | Schildstärke(Basis): | ||
| − | | style="background-color:#b2ffb0;" align="center" | 1.000 | + | | style="background-color:#b2ffb0;" align="center" | '''1.000''' |
| + | |- | ||
| + | | style="background-color:#D1DEEE;" align="center" | | ||
| + | | style="background-color:#D1DEEE;" align="center" | | ||
| + | |- | ||
| + | | style="background-color:#B4CDCD;" align="center" | max. Beam-Typ: | ||
| + | | style="background-color:#B4CDCD;" align="center" | 7 | ||
| + | |- | ||
| + | | style="background-color:#D1DEEE;" align="center" | | ||
| + | | style="background-color:#D1DEEE;" align="center" | | ||
|- | |- | ||
| style="background-color:#ffb0b0;" align="center" | Beam (Basis)/ max.: | | style="background-color:#ffb0b0;" align="center" | Beam (Basis)/ max.: | ||
| − | | style="background-color:#ffb0b0;" align="center" | 978 | + | | style="background-color:#ffb0b0;" align="center" | '''978''' |
|- | |- | ||
| style="background-color:#ffb0b0;" align="center" | Torpedo (Basis)/ max.: | | style="background-color:#ffb0b0;" align="center" | Torpedo (Basis)/ max.: | ||
| − | | style="background-color:#ffb0b0;" align="center" | 750 | + | | style="background-color:#ffb0b0;" align="center" | 750/ '''2.166''' |
|- | |- | ||
| style="background-color:#D1DEEE;" align="center" | | | style="background-color:#D1DEEE;" align="center" | | ||
| Zeile 462: | Zeile 538: | ||
|- | |- | ||
| style="background-color:#B4CDCD;" align="center" | Manövrierbarkeit: | | style="background-color:#B4CDCD;" align="center" | Manövrierbarkeit: | ||
| − | | style="background-color:#B4CDCD;" align="center" | normal | + | | style="background-color:#B4CDCD;" align="center" | normal/ ausreichend |
|- | |- | ||
| style="background-color:#B4CDCD;" align="center" | Scanstärke: | | style="background-color:#B4CDCD;" align="center" | Scanstärke: | ||
| Zeile 518: | Zeile 594: | ||
| style="background-color:#b2ffb0;" align="center" | Hüllenstärke(Basis): | | style="background-color:#b2ffb0;" align="center" | Hüllenstärke(Basis): | ||
| style="background-color:#b2ffb0;" align="center" | 140 | | style="background-color:#b2ffb0;" align="center" | 140 | ||
| − | | style="background-color:#b2ffb0;" align="center" | 225 | + | | style="background-color:#b2ffb0;" align="center" | 225/ '''675''' |
| − | | style="background-color:#b2ffb0;" align="center" | 700 | + | | style="background-color:#b2ffb0;" align="center" | 700/ '''2.100''' |
|- | |- | ||
| style="background-color:#b2ffb0;" align="center" | Schildstärke(Basis): | | style="background-color:#b2ffb0;" align="center" | Schildstärke(Basis): | ||
| style="background-color:#b2ffb0;" align="center" | 800 | | style="background-color:#b2ffb0;" align="center" | 800 | ||
| − | | style="background-color:#b2ffb0;" align="center" | 1.500 | + | | style="background-color:#b2ffb0;" align="center" | '''1.500''' |
| − | | style="background-color:#b2ffb0;" align="center" | 2.500 | + | | style="background-color:#b2ffb0;" align="center" | '''2.500''' |
| + | |- | ||
| + | | style="background-color:#D1DEEE;" align="center" | | ||
| + | | style="background-color:#D1DEEE;" align="center" | | ||
| + | | style="background-color:#D1DEEE;" align="center" | | ||
| + | | style="background-color:#D1DEEE;" align="center" | | ||
| + | |- | ||
| + | | style="background-color:#B4CDCD;" align="center" | max. Beam-Typ: | ||
| + | | style="background-color:#B4CDCD;" align="center" | | ||
| + | | style="background-color:#B4CDCD;" align="center" | 14 | ||
| + | | style="background-color:#B4CDCD;" align="center" | 14 | ||
| + | |- | ||
| + | | style="background-color:#D1DEEE;" align="center" | | ||
| + | | style="background-color:#D1DEEE;" align="center" | | ||
| + | | style="background-color:#D1DEEE;" align="center" | | ||
| + | | style="background-color:#D1DEEE;" align="center" | | ||
|- | |- | ||
| style="background-color:#ffb0b0;" align="center" | Beam (Basis)/ max.: | | style="background-color:#ffb0b0;" align="center" | Beam (Basis)/ max.: | ||
| style="background-color:#ffb0b0;" align="center" | 819 | | style="background-color:#ffb0b0;" align="center" | 819 | ||
| − | | style="background-color:#ffb0b0;" align="center" | 735 | + | | style="background-color:#ffb0b0;" align="center" | '''735''' |
| − | | style="background-color:#ffb0b0;" align="center" | 2.450 | + | | style="background-color:#ffb0b0;" align="center" | '''2.450''' |
|- | |- | ||
| style="background-color:#ffb0b0;" align="center" | Torpedo (Basis)/ max.: | | style="background-color:#ffb0b0;" align="center" | Torpedo (Basis)/ max.: | ||
| style="background-color:#ffb0b0;" align="center" | 750 | | style="background-color:#ffb0b0;" align="center" | 750 | ||
| − | | style="background-color:#ffb0b0;" align="center" | 750 | + | | style="background-color:#ffb0b0;" align="center" | 750/ '''3.583''' |
| − | | style="background-color:#ffb0b0;" align="center" | 1.333 | + | | style="background-color:#ffb0b0;" align="center" | 1.333/ '''5.333''' |
|- | |- | ||
| style="background-color:#D1DEEE;" align="center" | | | style="background-color:#D1DEEE;" align="center" | | ||
| Zeile 553: | Zeile 644: | ||
| style="background-color:#B4CDCD;" align="center" | Manövrierbarkeit: | | style="background-color:#B4CDCD;" align="center" | Manövrierbarkeit: | ||
| style="background-color:#B4CDCD;" align="center" | ausreichend | | style="background-color:#B4CDCD;" align="center" | ausreichend | ||
| − | | style="background-color:#B4CDCD;" align="center" | schlecht | + | | style="background-color:#B4CDCD;" align="center" | schlecht/ sehr schlecht |
| − | | style="background-color:#B4CDCD;" align="center" | ausreichend | + | | style="background-color:#B4CDCD;" align="center" | ausreichend/ schlecht |
|- | |- | ||
| style="background-color:#B4CDCD;" align="center" | Scanstärke: | | style="background-color:#B4CDCD;" align="center" | Scanstärke: | ||
| Zeile 621: | Zeile 712: | ||
|- | |- | ||
| style="background-color:#b2ffb0;" align="center" | Hüllenstärke(Basis): | | style="background-color:#b2ffb0;" align="center" | Hüllenstärke(Basis): | ||
| − | | style="background-color:#b2ffb0;" align="center" | 600 | + | | style="background-color:#b2ffb0;" align="center" | 600/ '''1.800''' |
|- | |- | ||
| style="background-color:#b2ffb0;" align="center" | Schildstärke(Basis): | | style="background-color:#b2ffb0;" align="center" | Schildstärke(Basis): | ||
| − | | style="background-color:#b2ffb0;" align="center" | 3.000 | + | | style="background-color:#b2ffb0;" align="center" | '''3.000''' |
| + | |- | ||
| + | | style="background-color:#D1DEEE;" align="center" | | ||
| + | | style="background-color:#D1DEEE;" align="center" | | ||
| + | |- | ||
| + | | style="background-color:#B4CDCD;" align="center" | max. Beam-Typ: | ||
| + | | style="background-color:#B4CDCD;" align="center" | 14 | ||
| + | |- | ||
| + | | style="background-color:#D1DEEE;" align="center" | | ||
| + | | style="background-color:#D1DEEE;" align="center" | | ||
|- | |- | ||
| style="background-color:#ffb0b0;" align="center" | Beam (Basis)/ max.: | | style="background-color:#ffb0b0;" align="center" | Beam (Basis)/ max.: | ||
| − | | style="background-color:#ffb0b0;" align="center" | 980 | + | | style="background-color:#ffb0b0;" align="center" | '''980''' |
|- | |- | ||
| style="background-color:#ffb0b0;" align="center" | Torpedo (Basis)/ max.: | | style="background-color:#ffb0b0;" align="center" | Torpedo (Basis)/ max.: | ||
| − | | style="background-color:#ffb0b0;" align="center" | 6.666 | + | | style="background-color:#ffb0b0;" align="center" | '''6.666''' |
|- | |- | ||
| style="background-color:#D1DEEE;" align="center" | | | style="background-color:#D1DEEE;" align="center" | | ||
| Zeile 642: | Zeile 742: | ||
|- | |- | ||
| style="background-color:#B4CDCD;" align="center" | Manövrierbarkeit: | | style="background-color:#B4CDCD;" align="center" | Manövrierbarkeit: | ||
| − | | style="background-color:#B4CDCD;" align="center" | miserabel | + | | style="background-color:#B4CDCD;" align="center" | sehr schlecht/ miserabel |
|- | |- | ||
| style="background-color:#B4CDCD;" align="center" | Scanstärke: | | style="background-color:#B4CDCD;" align="center" | Scanstärke: | ||
| Zeile 689: | Zeile 789: | ||
|- | |- | ||
| style="background-color:#b2ffb0;" align="center" | Hüllenstärke(Basis): | | style="background-color:#b2ffb0;" align="center" | Hüllenstärke(Basis): | ||
| − | | style="background-color:#b2ffb0;" align="center" | 1.000 | + | | style="background-color:#b2ffb0;" align="center" | 1.000/ '''3.000''' |
|- | |- | ||
| style="background-color:#b2ffb0;" align="center" | Schildstärke(Basis): | | style="background-color:#b2ffb0;" align="center" | Schildstärke(Basis): | ||
| − | | style="background-color:#b2ffb0;" align="center" | 4.000 | + | | style="background-color:#b2ffb0;" align="center" | '''4.000''' |
| + | |- | ||
| + | | style="background-color:#D1DEEE;" align="center" | | ||
| + | | style="background-color:#D1DEEE;" align="center" | | ||
| + | |- | ||
| + | | style="background-color:#B4CDCD;" align="center" | max. Beam-Typ: | ||
| + | | style="background-color:#B4CDCD;" align="center" | 16 | ||
| + | |- | ||
| + | | style="background-color:#D1DEEE;" align="center" | | ||
| + | | style="background-color:#D1DEEE;" align="center" | | ||
|- | |- | ||
| style="background-color:#ffb0b0;" align="center" | Beam (Basis)/ max.: | | style="background-color:#ffb0b0;" align="center" | Beam (Basis)/ max.: | ||
| − | | style="background-color:#ffb0b0;" align="center" | 3.960 | + | | style="background-color:#ffb0b0;" align="center" | '''3.960''' |
|- | |- | ||
| style="background-color:#ffb0b0;" align="center" | Torpedo (Basis)/ max.: | | style="background-color:#ffb0b0;" align="center" | Torpedo (Basis)/ max.: | ||
| − | | style="background-color:#ffb0b0;" align="center" | 9.999 | + | | style="background-color:#ffb0b0;" align="center" | '''9.999''' |
|- | |- | ||
| style="background-color:#D1DEEE;" align="center" | | | style="background-color:#D1DEEE;" align="center" | | ||
| Zeile 710: | Zeile 819: | ||
|- | |- | ||
| style="background-color:#B4CDCD;" align="center" | Manövrierbarkeit: | | style="background-color:#B4CDCD;" align="center" | Manövrierbarkeit: | ||
| − | | style="background-color:#B4CDCD;" align="center" | miserabel | + | | style="background-color:#B4CDCD;" align="center" | sehr schlecht/ miserabel |
|- | |- | ||
| style="background-color:#B4CDCD;" align="center" | Scanstärke: | | style="background-color:#B4CDCD;" align="center" | Scanstärke: | ||
| Zeile 753: | Zeile 862: | ||
| − | =Raumschiffe der anderen | + | =Raumschiffe der anderen Majors= |
{| cellspacing="0" style="border:2px solid #000000;padding:1em;padding-top:0.5em;" | {| cellspacing="0" style="border:2px solid #000000;padding:1em;padding-top:0.5em;" | ||
! width="140" bgcolor="#5948fe" align="center" | [[Raumschiffe der Terraner]] | ! width="140" bgcolor="#5948fe" align="center" | [[Raumschiffe der Terraner]] | ||
| Zeile 761: | Zeile 870: | ||
! width="140" bgcolor="#1fd5bd" align="center" | [[Raumschiffe der Omega-Allianz]] | ! width="140" bgcolor="#1fd5bd" align="center" | [[Raumschiffe der Omega-Allianz]] | ||
|} | |} | ||
| + | |||
| + | |||
| + | =Raumschiffe der Minors= | ||
Version vom 15. Januar 2012, 19:15 Uhr
Vorbemerkungen
Daten, Version 0.81 (Alpha 6.1).
(Generell sind immer die Ingame-Daten der jeweils aktuellen Version von Birth of the Empires maßgebend.)
- Alle max. Daten bei den Verteidigungs- und Waffensystemen sind exklusive der möglichen Boni der Spezialforschungen.
- Alle max. Daten der Hüllenstärke, sind bezogen auf die bestmögliche Hüllenpanzerung (meist doppelte Iridiumpanzerung).
- Bei der Manövrierbarkeit werden Werte mit und (wenn vorhanden) ohne doppelter Hüllenpanzerung angegeben. (doppelte Panzerung = -1)
Schiffsklassen
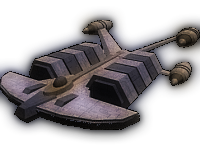
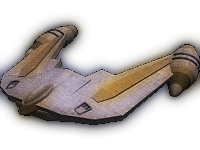
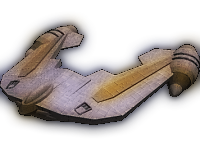
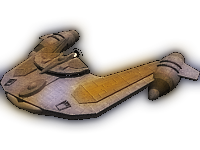
Transportschiffe/Transport Ship (Schiffstyp 0)
| Transporter: | Glantor | Glantor II |
|---|---|---|
|
| |
| Verfügbarkeit: | Tech 0 | Tech 5 |
| Hüllenstärke(Basis): | 300 | 800 |
| Schildstärke(Basis): | 600 | 800 |
| max. Beam-Typ: | - | - |
| Beam (Basis)/ max.: | - | - |
| Torpedo (Basis)/ max.: | - | - |
| Geschwindigkeit: | 1 | 2 |
| Reichweite: | mittel | mittel |
| Manövrierbarkeit: | miserabel | miserabel |
| Scanstärke: | 0 | 20 |
| Tarnfähig: | nein | nein |
| Lagerkapazität: | 4.000 | 7.000 |
| Unterhaltskosten: | 23 | 28 |
| Spezialeigenschaft 1: | Hüllenpolarisation |
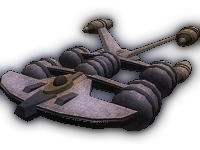
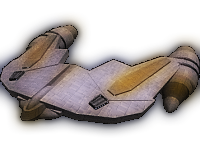
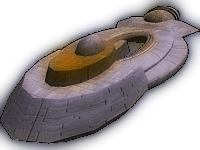
Kolonieschiffe/Colony Ship (Schiffstyp 1)
| Kolonieschiff: | Tirax I | Tirax II | Tirax III |
|---|---|---|---|
|

|
| |
| Verfügbarkeit: | Tech 0 | Tech 4,5 & 6 | Tech 8 |
| Hüllenstärke(Basis): | 200 | 500 | 1.200 |
| Schildstärke(Basis): | 400 | 4.000 | 1.200 |
| max. Beam-Typ: | - | - | - |
| Beam (Basis)/ max.: | - | - | - |
| Torpedo (Basis)/ max.: | - | - | - |
| Geschwindigkeit: | 1 | 1 | 3 |
| Reichweite: | mittel | mittel | mittel |
| Manövrierbarkeit: | miserabel | miserabel | schlecht/ sehr schlecht |
| Scanstärke: | 0 | 0 | 0 |
| Tarnfähig: | nein | nein | nein |
| Unterhaltskosten: | 4 | 26 | 49 |
| Spezialeigenschaft 1: | regenerative Schilde |
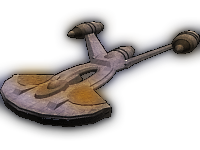
Sonden/Probe (Schiffstyp 2)
- Keine
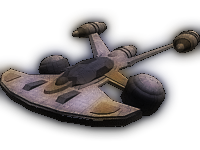
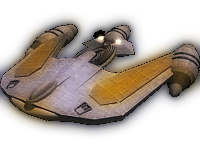
Aufklärer/Scout (Schiffstyp 3)
| Aufklärer: | Baran | Baran II | Baran III |
|---|---|---|---|
|
|
| |
| Verfügbarkeit: | Tech 0 | Tech 5 & 6 | Tech 8 & 9 |
| Hüllenstärke(Basis): | 80 | 180 | 600 |
| Schildstärke(Basis): | 160 | 1.000 | 1.800 |
| max. Beam-Typ: | 12 | ||
| Beam (Basis)/ max.: | 273 | 819 | 819 |
| Torpedo (Basis)/ max.: | 250 | 666 | 4999 |
| Geschwindigkeit: | 1 | 1 | 3 |
| Reichweite: | mittel | mittel | mittel |
| Manövrierbarkeit: | exzellent/ sehr gut | ||
| Scanstärke: | 0 | 0 | 0 |
| Tarnfähig: | nein | nein | nein |
| Unterhaltskosten: | 4 | 26 | 49 |
| Spezialeigenschaft 1: | regenerative Schilde |
Jäger/Fighter (Schiffstyp 4)
- Keine
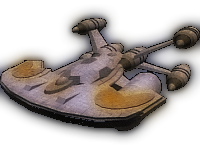
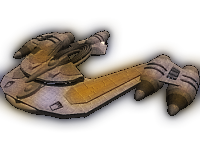
Fregatte/Frigate (Schiffstyp 5)
| Fregatte: | Vantor | Vooran | Yirin | Yirin II |
|---|---|---|---|---|
|

|

|

| |
| Verfügbarkeit: | Tech 1 | Tech 3 & 4 | Tech 5 | Tech 8 |
| Hüllenstärke(Basis): | 170 | 400 | 360/1.200 | 420/ 1.260 |
| Schildstärke(Basis): | 750 | 1.300 | 2.000 | 2.100 |
| max. Beam-Typ: | 10 | 12 | ||
| Beam (Basis)/ max.: | 864 | 1.638 | 2.450 | 2.184 |
| Torpedo (Basis)/ max.: | 500 | 750/ 3.583 | 666 | 4.999 |
| Geschwindigkeit: | 1 | 2 | 3 | 3 |
| Reichweite: | mittel | kurz | mittel | mittel |
| Manövrierbarkeit: | normal | normal/ ausreichend | normal | gut/ normal |
| Scanstärke: | 40 | 50 | 60 | 60 |
| Tarnfähig: | nein | nein | nein | nein |
| Unterhaltskosten: | 4 | 10 | 15 | 42 |
| Spezialeigenschaft 1: | Anti-Nahkampfschiff | Assaultschiff | Kommandoschiff | Anti-Nahkampfschiff |
| Spezialeigenschaft 1: | regenerative Schilde |
Zerstörer/Destroyer (Schiffstyp 6)
| Zerstörer: | Mgart |
|---|---|
| |
| Verfügbarkeit: | Tech 2 & 3 |
| Hüllenstärke(Basis): | 160/ 480 |
| Schildstärke(Basis): | 1.000 |
| max. Beam-Typ: | 7 |
| Beam (Basis)/ max.: | 978 |
| Torpedo (Basis)/ max.: | 750/ 2.166 |
| Geschwindigkeit: | 2 |
| Reichweite: | mittel |
| Manövrierbarkeit: | normal/ ausreichend |
| Scanstärke: | 60 |
| Tarnfähig: | nein |
| Unterhaltskosten: | 6 |
| Spezialeigenschaft 1: | Patrouillienschiff |
Kreuzer/Cruiser (Schiffstyp 7)
- Keine
Schwerer Zerstörer/Heavy Destroyer (Schiffstyp 8)
| Schwerer Zerstörer: | Tok | Golon | Wokatorn |
|---|---|---|---|
|
|
| |
| Verfügbarkeit: | Tech 2 & 3 | Tech 4 & 5 | Tech 6 |
| Hüllenstärke(Basis): | 140 | 225/ 675 | 700/ 2.100 |
| Schildstärke(Basis): | 800 | 1.500 | 2.500 |
| max. Beam-Typ: | 14 | 14 | |
| Beam (Basis)/ max.: | 819 | 735 | 2.450 |
| Torpedo (Basis)/ max.: | 750 | 750/ 3.583 | 1.333/ 5.333 |
| Geschwindigkeit: | 2 | 2 | 2 |
| Reichweite: | mittel | mittel | mittel |
| Manövrierbarkeit: | ausreichend | schlecht/ sehr schlecht | ausreichend/ schlecht |
| Scanstärke: | 40 | 50 | 40 |
| Tarnfähig: | nein | nein | nein |
| Unterhaltskosten: | 7 | 15 | 19 |
| Spezialeigenschaft 1: | Patrouillienschiff | Patrouillienschiff | Blockadeschiff |
| Spezialeigenschaft 2: | Raider | Raider | |
| Spezialeigenschaft 3: | Hüllenpolarisation | regenerative Schilde |
Schwerer Kreuzer/Heavy Cruiser (Schiffstyp 9)
- Keine
Kampfschiffe/Battleships (Schiffstyp 10)
| Kampfschiff: | G'Qora |
|---|---|

| |
| Verfügbarkeit: | Tech 6 & 7 |
| Hüllenstärke(Basis): | 600/ 1.800 |
| Schildstärke(Basis): | 3.000 |
| max. Beam-Typ: | 14 |
| Beam (Basis)/ max.: | 980 |
| Torpedo (Basis)/ max.: | 6.666 |
| Geschwindigkeit: | 2 |
| Reichweite: | mittel |
| Manövrierbarkeit: | sehr schlecht/ miserabel |
| Scanstärke: | 50 |
| Tarnfähig: | nein |
| Unterhaltskosten: | 62 |
| Spezialeigenschaft 1: | Assaultschiff |
| Spezialeigenschaft 2: | Kommandoschiff |
| Spezialeigenschaft 3: | regenerative Schilde |
Schlachtschiff/Flagschip (Schiffstyp 11)
| Schlachtschiff: | Han'Quhr |
|---|---|

| |
| Verfügbarkeit: | Tech 10 |
| Hüllenstärke(Basis): | 1.000/ 3.000 |
| Schildstärke(Basis): | 4.000 |
| max. Beam-Typ: | 16 |
| Beam (Basis)/ max.: | 3.960 |
| Torpedo (Basis)/ max.: | 9.999 |
| Geschwindigkeit: | 3 |
| Reichweite: | mittel |
| Manövrierbarkeit: | sehr schlecht/ miserabel |
| Scanstärke: | 80 |
| Tarnfähig: | nein |
| Unterhaltskosten: | 111 |
| Spezialeigenschaft 1: | Assaultschiff |
| Spezialeigenschaft 2: | Kommandoschiff |
| Spezialeigenschaft 3: | regenerative Schilde |
Aussenposten/Outposts (Schiffstyp 12)
- Minenbasis
- Handelsposten
Sternbasen/Starbases (Schiffstyp 13)
- Orbitale Handelsstation
- Orbitale Kontrollstation
- Unionsbasis
Raumschiffe der anderen Majors
| Raumschiffe der Terraner | Raumschiffe der Khayrin | Raumschiffe der Rotharianer | Raumschiffe der Cartarer | Raumschiffe der Omega-Allianz |
|---|
Raumschiffe der Minors
weitereführende Infos:
Raumschiffe - Allgemeine Informationen
Raumschiffe der Hanuhr - Homepage
Details über Schiffsklassen
Anhand der folgenden Schiffsklassennamen können im ShipEditor die genauen Daten nachgeschlagen werden, eine Übersicht in Form einer Excel-Datei ist hier.